

QueryString Processing Methods Comparison#
Let’s compare two methods for handling QueryString in Spring.
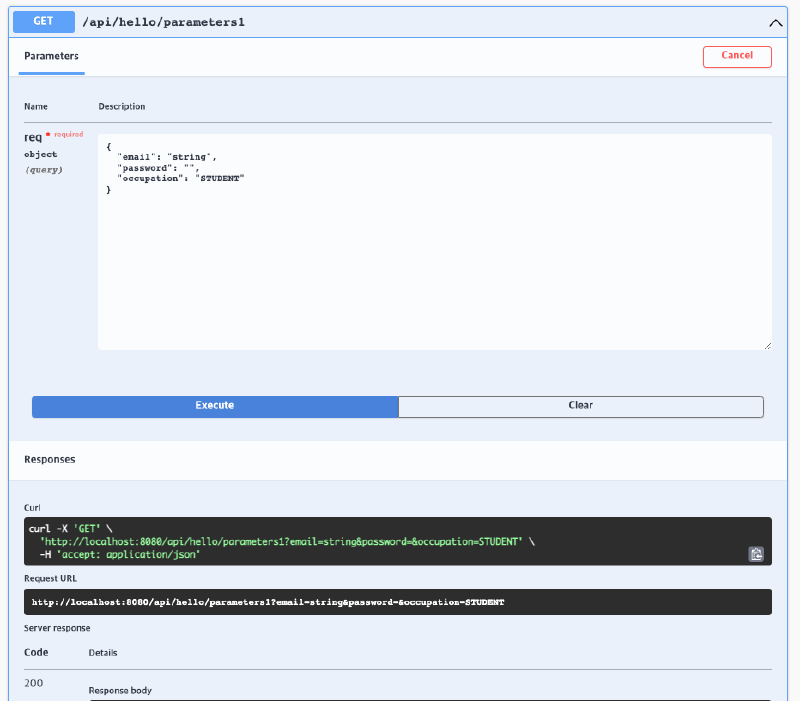
Method 1: Receiving as Object (ParameterObject)#
@Operation(tags = {"swagger"})
@GetMapping("/hello/parameters1")
public ResponseEntity<List<ResponseTest>> parameterObjectTest(ParameterObjectReq req) {
    ResponseTest response = new ResponseTest(req.email(), req.password(), req.occupation());
    return ResponseEntity.ok(List.of(response));
}
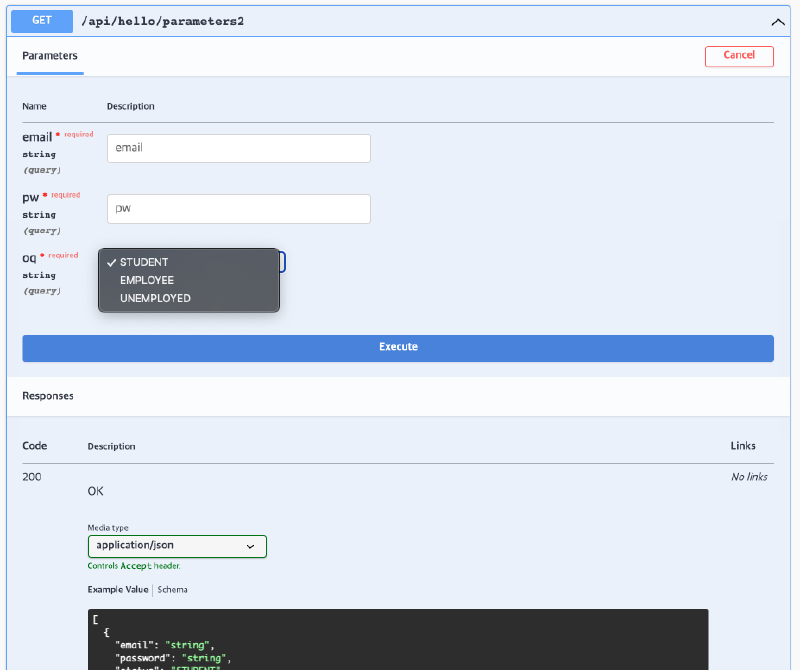
Method 2: Receiving as Individual Parameters (@RequestParam)#
@Operation(tags = {"swagger"})
@GetMapping("/hello/parameters2")
public ResponseEntity<List<ResponseTest>> parameterObjectTest2(
        @RequestParam(value = "email") String email,
        @RequestParam(value = "pw") String password,
        @RequestParam(value = "oq") OccupationStatus status
) {
    ResponseTest response = new ResponseTest(email, password, status);
    return ResponseEntity.ok(List.of(response));
}
Model Definition#
ParameterObjectReq (Request DTO)
public record ParameterObjectReq(
        String email,
        String password,
        OccupationStatus occupation
) {
}
OccupationStatus (Enum)
public enum OccupationStatus {
    STUDENT,
    EMPLOYEE,
    UNEMPLOYED
}
Differences Between the Two Approaches#
While @RequestParam is commonly used for receiving QueryString requests, when there are many parameters, you can receive the QueryString as an Object like in the first method.
@RequestParam vs ParameterObject#
- @RequestParam: By default set to
required = true, making request values mandatory. - ParameterObject: Spring automatically binds QueryString to the object’s field values without any special annotation. However, since
requiredis not set by default,nullvalues can be passed.
ParameterObject vs @RequestParam Conversion in Springdoc#
Using ParameterObject#
Using @RequestParam#
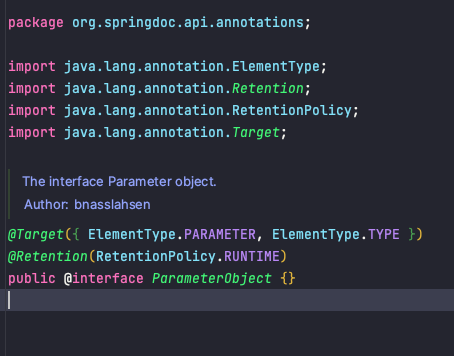
Using @ParameterObject Annotation#
To make Springdoc convert ParameterObject like when using @RequestParam and display the Required status, configure as follows.
Code Example#
@ParameterObject
public record ParameterObjectReq(
        @NotNull
        String email,

        @NotNull
        String password,

        OccupationStatus occupation
) {
}
@ParameterObject is a Springdoc annotation. When receiving multiple QueryStrings as an Object, specifying it on the class will make it recognize and convert like @RequestParam.
JSR-303 Support#
Springdoc supports JSR-303 and allows the following validation annotations:
@NotNull@Min,@Max@Size- Other validation annotations
According to Springdoc official documentation
This library supports
- OpenAPI 3
- Spring-boot (v1, v2 and v3)
- JSR-303, specifically for @NotNull, @Min, @Max, and @Size
- Swagger-ui
- OAuth 2
- GraalVM native images
Conversion Result#
The spec file is written so that ParameterObject is also recognized as @RequestParam, and occupation without @NotNull is displayed as optional in the Required field.

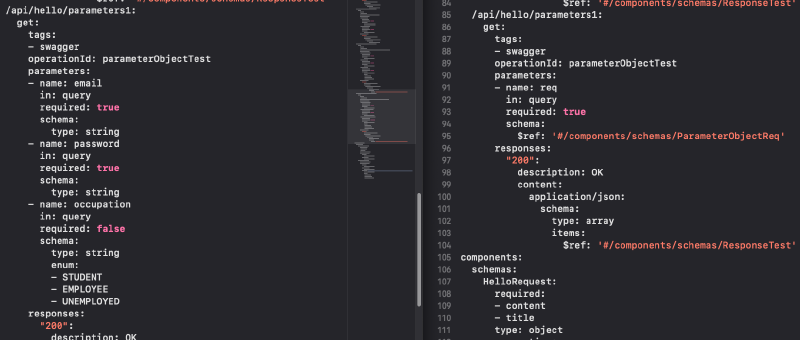
Left Image: When @ParameterObject is specified, Springdoc recognizes it and converts to proper spec
Swagger2 → Swagger3 Annotations#
| Swagger2 | Swagger3 | Description |
|---|---|---|
| @Api | @Tag | Displays swagger resource at class level (for grouping)name : Tag namedescription : Tag description |
| @ApiIgnore | @Parameter(hidden = true) @Operation(hidden = true) @Hidden | This annotation allows hiding parameters in swagger-ui. For requestBody or ResponseBody, use @JsonProperty(access = JsonProperty.Access.READ_ONLY) |
| @ApiImplicitParam | @Parameter | Configuration and resource display for single RequestParam |
| @ApiImplicitParams | @Parameters | Configuration for multiple RequestParams |
| @ApiModel | @Schema | description : Human-readable namedefaultValue : Default valueallowableValues : Allowable values (set when enumerable) |
| @ApiModelProperty(hidden = true) | @Schema(accessMode = READ_ONLY) | |
| @ApiOperation(value = “foo”, notes = “bar”) | @Operation(summary = “foo”, description = “bar”) | summary : Brief description of APIdescription : Detailed description of APIresponses : List of API responsesparameters : List of API parameters |
| @ApiParam | @Parameter | name : Parameter namedescription : Parameter descriptionin : Parameter location (query, header, path, cookie) |
| @ApiResponse(code = 404, message = “foo”) | @ApiResponse(responseCode = “404”, description = “foo”) | responseCode : HTTP status codedescription : Response descriptioncontent : Response payload structureschema : Schema used in payloadhidden : Whether to hide schemaimplementation : Schema target class |
- When using an object to capture multiple request query params, use the
@ParameterObjectannotation on that method argument - This step is optional: Replace with
GroupedOpenApibean only if you have multipleDocketbeans
Using @Tag Annotation#
The @Tag annotation enables the following grouping:
- Grouping by Controller
- Grouping by method within Controller
- Grouping in spec file conversion according to the name specified in
@Tag - File creation with that name when generating client code using OpenAPI Generator
Cautions When Using Multiple @Tag#
Question: What happens if you group with @Tag at the top level and set a different tag name in the @Operation of a lower-level method?
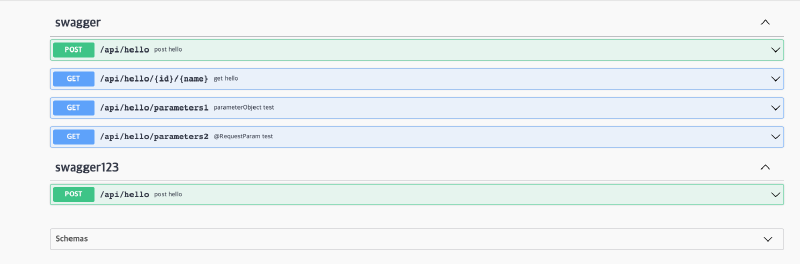
Test Result#
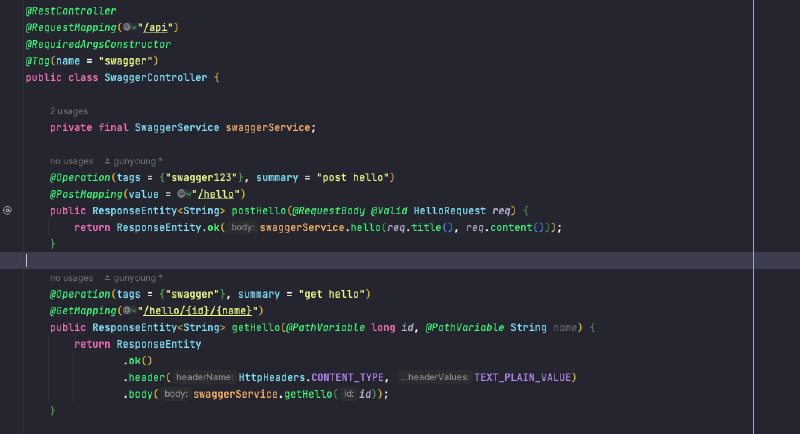
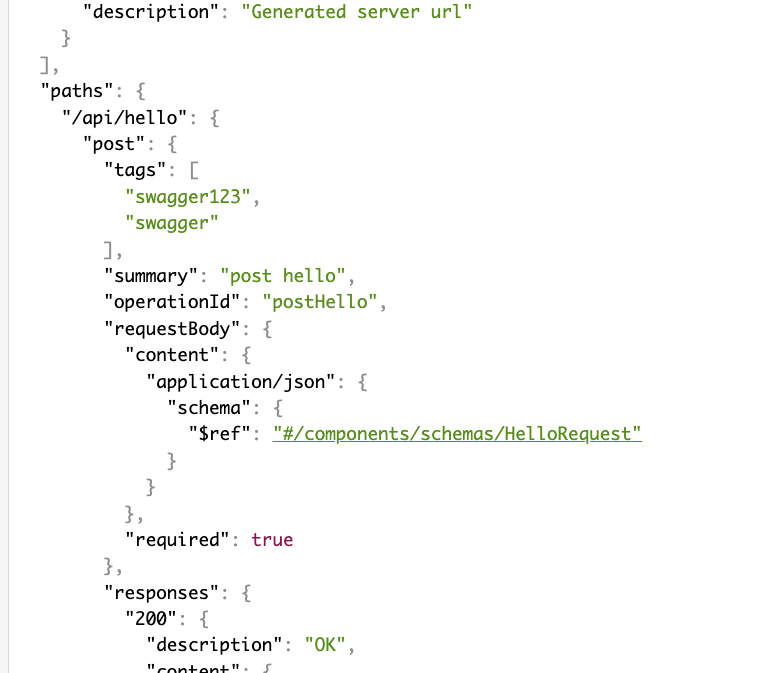
When @Tag(name = "swagger") is set at the top level and tags = {"swagger123"} is added in the @Operation of the postHello method, the same endpoint is created as duplicate groups.
Problem#
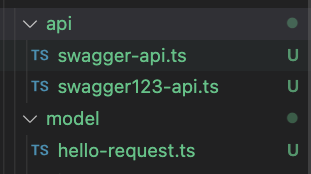
Using OpenAPI Generator in this state causes the problem of duplicate client code being generated as shown below.
Recommendation: Unless there’s a special case, it’s recommended to use @Tag grouping only at the Controller’s top level.
File Naming for OpenAPI Generator Client Code Generation#
When generating client code, the name specified in @Tag + -api is added as a postfix. To customize this, you need to modify the Mustache file.
References#
- Using Templates | OpenAPI Generator
- Mustache.js GitHub
- OpenAPI Generator Usage Guide
- Auto-generating Safe Models and Standardized Implementation Code with OpenAPI Generator
Authentication-Related OpenAPI Specs#
OpenAPI supports various authentication methods. Key configuration items are as follows.
type (Authentication Format)#
Currently supports API Key, HTTP, OAuth2, and OpenID Connect methods. Note: OpenAPI v2 spec does not support OpenID Connect method.
Supported Types
http: Basic, Bearer and other HTTP authentication schemesapiKey: API key and cookie authenticationoauth2: OAuth2 authenticationopenIdConnect: OpenID Connect discovery
Key Configuration Items#
name: Authentication key name (required when using API Key method)in: Specifies authentication key location (choose fromquery,header,cookie, required when using API Key method)scheme: Specifies authentication method (BasicorBearer, required when using HTTP authentication)bearerFormat: Bearer token format (commonlyJWT)flows: OAuth2 flow type (choose fromimplicit,password,clientCredentials,authorizationCode)openIdConnectUrl: OpenID Connect URL (recommended to use OAuth2 or Bearer token method as alternative in OpenAPI v2 spec)
@Deprecated Strategy#
When there are changes to DTO specs due to API version updates, use the following phased strategy.
Phase 1: Mark with @Deprecated#
First, add the @Deprecated annotation to the field that will change.
public class UserDto {
    @Deprecated
    private String oldField;

    private String newField;
}
The OpenAPI spec will also show deprecated for that schema field, and when generating code on the frontend, the field will be marked as deprecated. This notifies the frontend team in advance that the field will be removed soon.
Phase 2: Apply @Schema(hidden = true)#
Once the frontend has completed migration to the new spec, add @Schema(hidden = true) to the @Deprecated field on the server so that the field is no longer generated in the OpenAPI spec.
public class UserDto {
    @Deprecated
    @Schema(hidden = true)
    private String oldField;  // Excluded from spec

    private String newField;
}
Phase 3: Remove Field#
After sufficient time has passed, completely remove the field.
This phased approach enables safe API version management between frontend and backend.

